Notice»

Recent Post»

Recent Comment»

Recent Trackback»

Archive»

« 2024/4 »
1 2 3 4 5 6
7 8 9 10 11 12 13
14 15 16 17 18 19 20
21 22 23 24 25 26 27
28 29 30


25 Tips Every Mac User Should Know

Creativity | 2011. 5. 13. 12:38 | Posted by 스마트 안전보건

We spend far too much time tinkering with OS X, and over the years we've picked up countless quick tips that make spending 12 or 14 hours a day in Apple's OS a bit more bearable.

Have a look through our favorite tricks for the latest Mac OS X release, version 10.6 (aka "Snow Leopard"). From handy keyboard shortcuts to under-the-radar features, all of these tricks are accessible without downloading any additional software.

Tap to Click

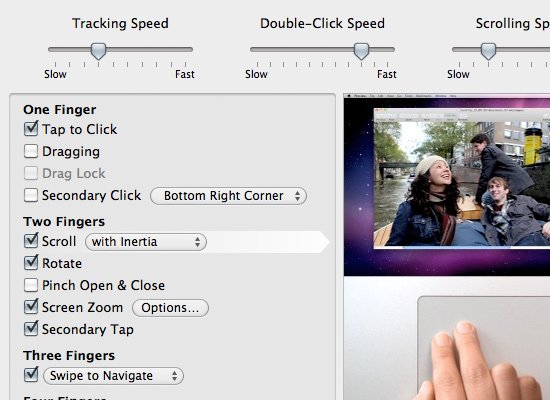
When you're clicking thousands of times a day, that extra couple of millimeters required to click the trackpad button adds up. Turn on "Tap to Click" by going to System Preferences > Trackpad on your Apple laptop.

Power-Up Your App Switching

Most people know that hitting Command-Tab cycles through your currently running apps, but a two finger swipe or spin of the scroll wheel lets you quickly select the app you want with just a flick of your finger. While Command-Tabbing to move between apps, you can quit or hide an app while the cursor is over it by tapping Q or H.

Define Words Within Apps

In most apps, you can highlight any word and hold down Command-Control-D to get a pop-up definition from OS X's built-in dictionary. (Some third-party apps don't support this feature.)

Stealthily Hide Apps

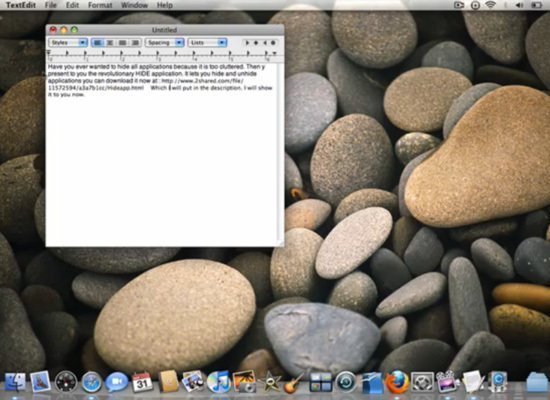
Boss coming over while you're finishing up a game of Angry Birds? Tap Command-H to instantly hide the app you're currently using. Command-option-H hides all apps running in the background. You can also tap Command-Option-M to minimize all the windows in an app to the Dock. The completely desperate can tap Command-Option-Shift-Q to immediately log out.

Find Out Where You've Saved A File

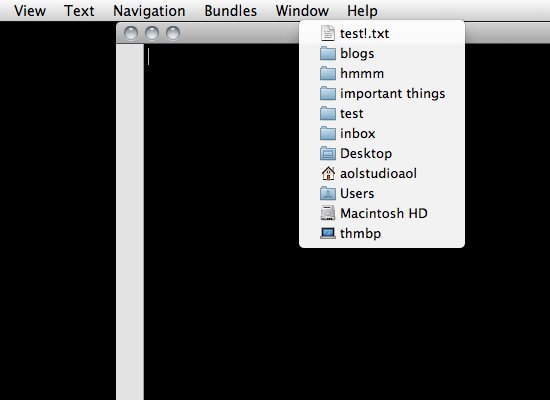
In document-based applications like TextEdit and Preview, command-clicking (or right-clicking) the icon at the top of the window reveals exactly where the file is saved. It's handy for when you're not sure where you've saved something and don't want to search via Spotlight.

Dig Deep

If you're buried deep in your photo archives and need to quickly move back out, Command-up (or Command-[) on they directional keypad will pull you back a directory. Similarly, tapping Command-Down (Command-]) takes you deeper into the system.

Pull Up Your App Folder

Command-Option-A, tapped from anywhere in the Finder, whisks you to the Applications folder. Similarly, Command-Option-D opens up a new Finder window showing off your Desktop.

Open Files From The Dialogue Box

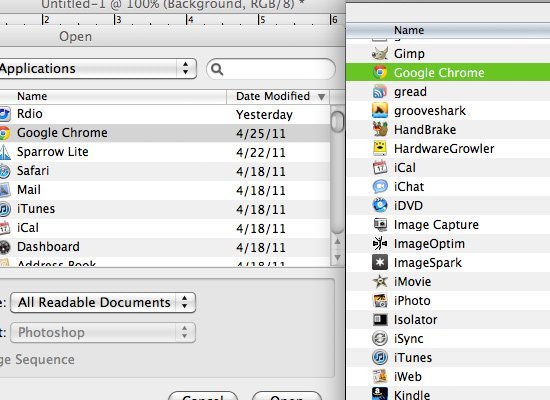
When you're in the open dialogue box in most apps, you sometimes want to actually interact with the file back in the finder. Usually, this involves hiding all the windows, navigating to the correct folder in the Finder, and generally too much clicking. Instead, while in the Open dialogue, just hit Command-R, and a Finder window will open with that file selected.

Source: http://www.21stcenturyfluency.com/

:

Capster_Mac Application to show caps lock on/off

Creativity | 2011. 4. 23. 20:42 | Posted by 스마트 안전보건

맥킨토시를 사용하시다가 잘못 눌러서 부지불식간에 Caps Lock이 켜져 있는 채로 작업을 한 경험이 있으실 것입니다.

remotesnap000052.jpg

유일하게 Caps Lock이 켜져 있는지 안켜져 있는지 알 수 있는 길은 키보드 자판의 Caps Lock에 초록색 불이 들어왔는지 안들어왔는지 확인하는 방법 밖에는 없는데요. 이제는 그런 고민 (?) 또는 불편한 없이 Mac 스크린에 Caps Lock의 On/Off 여부를 분명하게 보여주는 아주 유용한 애플리케이션이 있어서 소개하고자 합니다.

capster-188-234551.png

용량도 작고 설치 방법도 아주 간단합니다. 디자인이라고 할 것 도 없이 조그만 사각형 바가 스크린 오른쪽 위에 나타나면서 Caps Lock의 On/Off 여부를 시각적으로 보여주니 이보다 쉽고 편하게 애플리케이션을 사용할 수는 없을 것 같습니다.

Capster 1.6.5 (Capster Developer Page)

Original Download1

Mirrored Download2


Original Post (English)

CAPS Warn is a menu-bar utility that displays a bright-red icon and sounds an alert whenever caps lock is enabled. But if you’re already using the excellent Growl notification system, a simpler—but just as effective—option is Capster (download link).

Launch Capster—it can run invisibly as a background-only application—and if you press the caps-lock key, intentionally or not, Capster pops up a Growl notification letting you know. Disable caps lock, and you get a Growl confirmation of that, too.

Because it uses Growl, you can customize Capster’s alerts using Growl’s System Preferences pane. For example, you can choose a different Growl display style and onscreen position for your Capster alerts than for other Growl notifications. You can also choose separate notification options (display style, priority, and alert sound) for when you enable caps lock and when you disable it—on my Mac, the caps-lock-on alert uses High priority (which means it pulses red) and an audible alert, while the caps-lock-off alert uses Normal priority and doesn’t make a sound.

Capster’s only other settings let you choose whether or not the utility displays a systemwide menu; and, if not, which keyboard shortcut you need to press to access these settings. If you choose to display the menu, you get several options for its menu-bar icon; whichever one you choose, the menu icon works much like CAPS Warn, changing its appearance whenever caps lock is enabled.

Because it relies on Growl for notifications, Capster doesn’t have some of the unique options of CAPS Warn, such as the capability to warn you whenever you’ve typed more than a set number of capital letters in a row—say, if you typed them using the Shift key instead of caps lock. (These days, CAPS Warn can also notify you when other modifier keys are pressed.) I also found what appears to be a minor bug in Capster: If caps lock is enabled, pressing Shift produces the Caps Lock On alert. But Capster works well, and if you’re already using Growl, Capster is a simple and easy way to get a convenient and popular feature.

Source: macworld.com

이 글은 스프링노트에서 작성되었습니다.

:

Rotate MacBook Screen Orientation

Creativity | 2011. 3. 31. 07:03 | Posted by 스마트 안전보건

As people can rotate their screens in Windows with another application, people can rotate displays of Macintosh as well.

But for Macintosh, there is not any software needed to rotate the screen orientation.

스크린샷_2011-03-30_오후_3.48.19.png

<A normal screen shot of MacBook>

스크린샷_2011-03-30_오후_3.47.30.png

<A normal screen shot of Display pane in Preference of MacBook>


All you need is to press two more buttons than usual.

Here is how you can manage to rotate your MacBook display orientation.

  • Launch System Preferences (quit it if it’s already open)
  • Hold down the Command+Option keys and click on “Display”
  • Look for ‘Rotation’ on the right side of the Display window and take your pick

After the display has been rotated, the resolutions adjust from width x height to height x width.

Here’s a screenshot taken with the display on a MacBook Air set at 90° rotation.

You can see one more content, when you hold down the Command+Option and click on "Display". That is 'Rotate (회전)'.

스크린샷_2011-03-30_오후_3.47.44.png

<A rotate screen shot of Display pane in Preference of MacBook>


스크린샷_2011-03-30_오후_3.47.56.png

<A rotate screen shot of MacBook>

이 글은 스프링노트에서 작성되었습니다.

:

The history of PowerPoint (ppt)

Education | 2011. 2. 14. 17:01 | Posted by 스마트 안전보건

This is the PowerPoint history.
Bob Gaskins, a former Berkeley Ph.D. student, conceived PowerPoint

originally as an easy-to-use presentation program. He hired a software

developer, Dennis Austin, in 1984 to build a prototype program, called

"Presenter," later changing the name to PowerPoint for trademark reasons.

goldberg_3220.jpg

Dennis Austin (middle), Bob Gaskins (right)


PowerPoint 1.0 was released in 1987 for the Apple Macintosh platform; later

that year Gaskins's company Forethought and the program were purchased

by Microsoft for $14 million.

powerpoint1ke3.gif

PowerPoint 1.0 on Mac


The first Windows and DOS versions of PowerPoint followed in 1988.

PowerPoint became a standard part of the Microsoft Office suite in 1990.

According to Microsoft, more than 30 million presentations are made around

the world with PowerPoint every day.

PowerPoint.png

PowerPoint 2010

이 글은 스프링노트에서 작성되었습니다.

: